Things you should know
Adding Album Art
The first thing you’re probably gonna want to do that isn’t obvious is add album art.
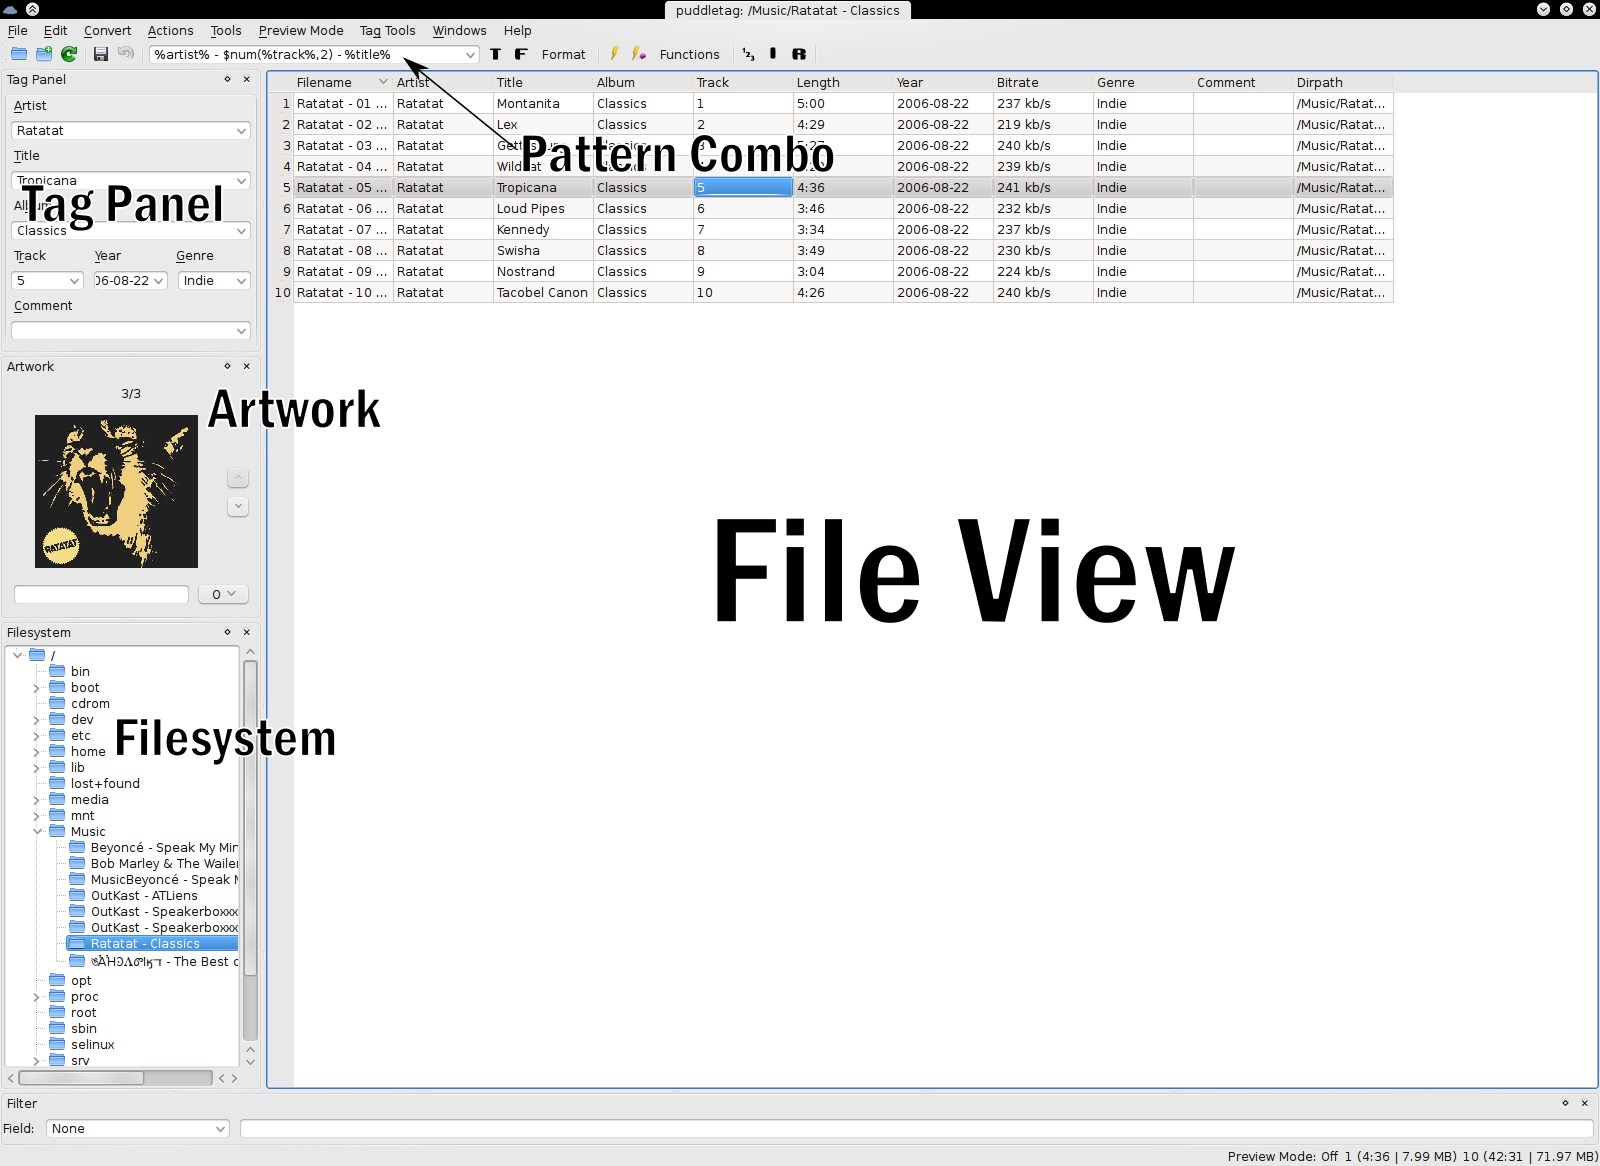
Show the Album Art window by using Windows→Artwork menu. Artwork isn’t shown by default, because I can’t get that damn window to resize correctly. Anyway your layout should look something like this (I’ve loaded a folder in the mean time). Right-clicking on the artwork window will bring up options for editing album art.
There’s more with regards editing album art below.

The File-View
It lists the the metadata for the fields you’ve selected to display.
You can write to multiple files at once. Just select the files. Choose the field you want to write to and write as normal. All selected files will be updated.
Multiple-valued fields are shown like value1\value2. Enter a value like that and puddletag will assume you want some multiple values.
Right Click on it to get the context menu. Menu items are just as described in Menus.
When you press Enter after editing a cell, puddletag opens the one just be below it for editing. Shift+Enter will open the one directly above, Tab the one to the right and Shift+Tab the one on the left.
The Pattern Combo
Pressing F8 switches focus between it and the file-view.
Patterns aren’t saved by default. Just press Enter and whatever’s currently there will be added to the list. Edit→Preferences→Tag Panel works as a more fully featured editor.
Tag Panel
Like in the file-view multiple values are shown like value1\value2. Entering any value like that will automatically split it.
Use accelerators like your life depends on them. Pressing Alt+B will switch the focus to the Album field. I usually just switch to the first (Artist) and TAB through everything. See the Tag Panel section on the preferences page for info in creating them.
Artwork
Artwork can be modified using three approaches.
Using Windows→Artwork. Right click on the window to get options for adding/removing artwork.
The Extended Tags dialog also allows editing in the same manner.
If you’re loading many covers at once, rather use the Load artwork Function.
Note
When using Windows→Artwork, covers you modify aren’t saved automatically. You still need to use Save from the File menu.
Editing artwork using Windows→Artwork or Extended Tags
If using Windows→Artwork, right click on the shown picture container to get a menu. With it you can add/remove/edit artwork. Extended tags has buttons for these operations next to the picture.
For ID3, be sure to always add descriptions for your covers in the text box just below since the ID3 standard doesn’t allow for covers to have the same description.
Choose a cover type by clicking the button next to the description box.
Click on the cover to see it full-sized. Clicking on the newly-opened window will close it.
Cycle through the artwork by using the Up and Down buttons next to the picture. If the picture should <blank> artwork will be removed upon saving. <keep> will leave artwork unmodified for each file.
Filesystem
Click on a folder to open it.
You can select more than one folder at a time.
Right click on any folder to get a Context Menu. The menu items are pretty self-explanatory.
Functions

In the Fields list:
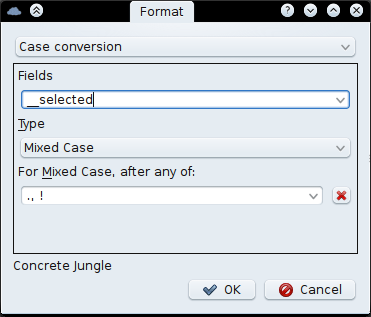
Having __selected as the field will apply the selected function to the selected cells. So if you have the album field selected in one file and artist in another. The function’ll be applied to the album field of the first file and artist of the other respectively.
__all will write to all the fields found in a file except filename related fields like __dirname, __filename, etc.
You can enter your own fields like albumartist or performersort.
Multiple fields can be written to at a time by separating them by commas like artist, album, title, or even albumartist, __selected.
If you want to write to all fields but the ones you specify use ‘~’. Eg. ~artist, title, year will write to all but the artist, title and year fields. ~__selected will write to all, but the selected.
You can put ‘~’ anywhere you want (as long as it’s at the start of a field name) like artist, title, album, ~__selected. One use case is if for when you want to do Case Conversion to all but the a few fields like musicip_puid and fingerprint that should remain unchanged. __all, ~musicip_puid, fingerprint does as suggested.
Actions
I recommend you assign shortcuts to your favourite actions like Ctrl+1, Ctrl+2 etc. Use the Assign Shortcut button on the Actions Dialog.